

Businesses all over the globe have become wise to the ways of Python. Those looking to employ Machine Learning, Artificial Intelligence, or Big Data into their pipelines understand that Python has become a must. Why? Not only is Python incredibly simple to learn and use, it makes it possible to integrate disparate systems with one another.
And those who develop with Python for the likes of Machine Learning and Artificial Intelligence know there are a lot of moving parts. Because of that, developers are always looking at ways to help improve the process. That’s why the non-profit organization, Jupyter, created a tool to make the task of developing with Python even easier.
Introducing the Jupyter Notebook.
A Jupyter Notebook is an interactive computing environment where developers can author notebook documents that contain live code, interactive widgets, plots, narrative text, equations, images, and video. In other words, it’s a place for you to keep various types of notes for your projects and even run those projects from within a web browser.
But more important to developers, a Jupyter Notebook allows them to run their Python 3 code from within a browser. This makes for a great testing environment.
I want to walk you through the process of deploying a Jupyter Notebook and then demonstrate how to use the tool. I’ll be demonstrating on Ubuntu Desktop 20.04, but you can deploy this on any platform that supports Python.
Installing Python 3
The first thing to be done is the installation of Python 3. Chances are pretty good this is already installed on your system, but on the off chance it isn’t, here’s how to install it. Log into your desktop and open a terminal window. From the terminal window, issue the command:
1sudo apt-get install python3 -yYou can verify which version of Python was installed by running the command:
1python3 --versionYou should see something like Python 3.8.5 printed out.
Once Python is installed, you have to take care of a dependency that will allow you to create virtual environments, with the command:
1sudo apt-get python3-venv -yYou also need to install pip, which is a tool used to install Python packages. Without it, you won’t be able to install the other applications that are required to deploy the Jupyter Notebook.
To install pip, issue the command:
1sudo apt-get install python3-pip -yWith pip installed, you can now continue to the next step.
Installing Voila and Jupyter
Next, you have to install Voila, which is the software that makes it possible to interact with Jupyter Notebooks through a web browser.
First, create a new directory with the command:
1mkdir voilaChange into that newly created directory with the command:
1cd voilaNow, create your virtual environment using the command:
1python -m venv venvThis will create a new subdirectory, venv, which includes a number of files and directories. You now need to use the source command to load a number of predefined variables to the shell. This is done with the command:
1source venv/bin/activateYou can now install voila with pip, by running:
1pip install voilaThe voila installation will only take a couple of minutes (depending on how fast your network connection is). When it completes, install jupyter, numpy, and matplotlib with the command:
1pip install jupyter numpy matplotlibIn the above command, you’ve not only installed jupyter, but you’ve also installed two Python libraries, numpy, and matplotlib, that are used for scientific calculations.
Deploy the Jupyter Notebook
It’s now time to deploy the notebook. For this, issue the command:
1jupyter notebookWhen the command completes, you should be given two URLs to open. Click the first link (which will look like http://localhost:8888/?token=TOKEN – Where TOKEN is a long string of random characters) and your default browser will open to the default page for the notebook (Figure 1).
Figure 1
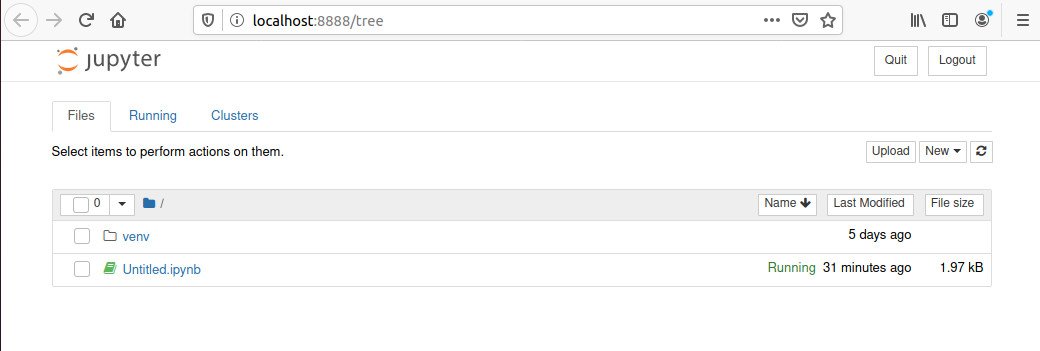
A newly deployed Jupyter Notebook is ready for work.
From that page, click the New drop-down and select Python 3. On the resulting page (Figure 2), you should see an empty cell, where you can start adding code.
Figure 2
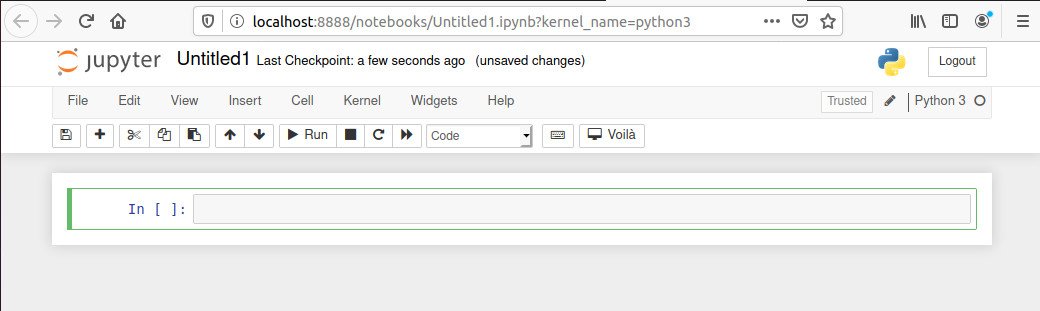
Your new test notebook is ready for some code.
In that cell, paste the following comment (we’re going to build a test app):
1# A test of Python3 code in a Jupyter Notebook Click the + button to add a new cell below the current. In that new cell paste the following Python code to import both numpy and matplotlib into the project:
1import numpy as np
2import matplotlib.pyplot as plt
3from ipywidgets import interactive
4%matplotlib inline
Once again, click the + button to add a new cell. In the resulting cell, paste the following Python code to create the actual application:
1def plot_func(a, f):
2    plt.figure(2)
3    x = np.linspace(0, 2*np.pi, num=1000)
4    y = a*np.sin(1/f*x)
5    plt.plot(x,y)
6    plt.ylim(-1.1, 1.1)
7    plt.title('a sin(f)')
8    plt.show()
9interactive_plot = interactive(plot_func, a=(-1,0,0.1), f=(0.1, 1))
10output = interactive_plot.children[-1]
11output.layout.height = '300px'
12interactive_plot
With all of the code copied, click on the top cell and then click the Run button. This will automatically kick down to the next cell. Click Run again (to import the libraries). Finally, after the third cell is selected, click Run one final time.
At this point, you should now see an interactive element below the third cell. You can drag the sliders to change the frequency and amplitude of the sine wave in real-time (Figure 3).
Figure 3

Your Python app is running.
At the moment, your notebook is named Untitled. To rename the notebook, click on Untitled near the top of the window, type a new name, and click Rename. After you’ve renamed the notebook, make sure to click the Save button. Although Jupyter does autosave, it’s not very frequent, so you’ll want to make sure to save your work as you go.
If you go back to the Jupyter home page, you should see your newly renamed and saved project listed (Figure 4).
Figure 4
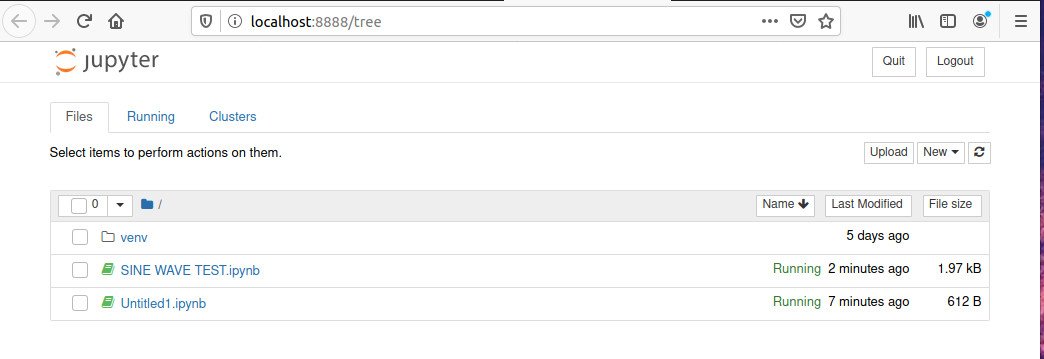
Your new project has been named and saved.
You can go back to that project, at any time, by clicking on the name.
When you’re finished with your project, close the web browser and go back to the terminal where you ran the jupyter notebook command. Hit the key combination Ctrl+c to end the service. Whenever you want to return to your notebook, re-run the jupyter notebook command, open your project, and you’re good to go.
Conclusion
Anyone who’d like an interactive, web-based Python environment that will help make various programming tasks a bit simpler should give the Jupyter Notebook a try. Not only will your process be better organized, but you’ll also enjoy interactive widgets for your Python applications—all from the convenience of your web browser.
If you enjoyed this article, check out one of our other Python articles.


